Monday, June 6, 2011
Sunday, June 5, 2011
Summer 2011
It's been over a month since I posted anything.
Since it's summer, I vow to update this blog at least twice a week.
I'm actually considering doing YouTube tutorial videos, but that will only happen when I have more practice and creative looks.
But yes, be on the lookout for an upcoming post!
Have a lovely summer. <3
Since it's summer, I vow to update this blog at least twice a week.
I'm actually considering doing YouTube tutorial videos, but that will only happen when I have more practice and creative looks.
But yes, be on the lookout for an upcoming post!
Have a lovely summer. <3
Tuesday, May 3, 2011
Always look online in Sephora's sale section.
I just bought Kat Von D's Truth palette for only $17. Original price is $34. I am SO glad I did not get Truth the last time I was at Sephora!
Super excited for it to come in!
Super excited for it to come in!
Wednesday, April 27, 2011
Looking at my previous posts,
and all I do is shop at Sephora. I never realized, haha! So, I have decided to find other stores and brands to try instead of sticking with only Sephora. Plus, I'm pretty sure my wallet will thank me.
What are brands that seem to work for you at an affordable price?
What are brands that seem to work for you at an affordable price?
BEAUTY INSIDER DEALS.


- Heaven and Push-Up from Natural Eye
- Silver Spoon and Smolder from Smoky Eye
- Satin Sheets and Like A Virgin from Natural Eye
- Honeymoon and Ever After from Romantic Eye
If you haven't already, sign up for Sephora's beautyinsider and see your points rack up!
Too Faced Romantic Eye Palette & Sephora brush set!
Hey guys! So I was supposed to post this on April 17, but I became so lazy.. I'm sorry!
So I don't know if I ever posted my debate over which palette to get next. It was between Kat Von D's True Romance Truth or Too Faced's Romantic Eye. Literally, I had both of the palettes in my hand and couldn't decide in the middle of Sephora. I decided on Romantic Eye, because the case won me over, hahaha :). I told myself I'd get Truth next time.
 What I really love the most about this palette (besides the beautiful colors), are the cards that come inside of it. There are 3 cards, and it gives you 3 different looks that you can use with the colors from the palette. In this post, I decided to try "Fashion".

The palette is set up in a simple way. As you can see from above, there are three colors set up in a row. The look "Fashion" is the third row. So basically, I would take a large shader brush and apply Bouquet Toss from my lashes to brow. Then I would take a regular shader brush, go to the next color (which is Honeymoon), and apply it all over the inner half of my lid. Afterwards, I would go to Ever After, apply it on the outer lid using an angled brush, and blend it all together with a blending brush. Instead of using a dramatic eyeliner, I would take my angled brush again and use Ever After on the lower lash line. Finish the look off with a few coats of your favorite black mascara.
Of course, you don't have to follow the cards. I decided to follow it to see how it'll look, and I really like the combination. I tried every single card, and the only one I don't care for is the "Day" look. Mix up the colors. Go against the cards. No matter what you come up with, it's going to match and look beautiful. I did that, and I actually recreated a day look that looks gorgeous.
 Along with the palette, I also bought Sephora's Smokey Eye Brush Set! :) I've been needing makeup brushes for so long now, and I finally purchased it! For an $89 value, I only bought it for $42. I use these brushes on the days I wear eyeshadow, and they work great! I've washed them a couple of times, and the bristles didn't fall out. It applies my makeup pretty well, and I am satisfied with the set. I actually used this set when I first tried out the Too Faced palette. It comes with:
I've used both of these products frequently ever since I bought it. Overall, I would say the price is worth it. If you're thinking of getting either one, it passed my test. :)
So I don't know if I ever posted my debate over which palette to get next. It was between Kat Von D's True Romance Truth or Too Faced's Romantic Eye. Literally, I had both of the palettes in my hand and couldn't decide in the middle of Sephora. I decided on Romantic Eye, because the case won me over, hahaha :). I told myself I'd get Truth next time.


The palette is set up in a simple way. As you can see from above, there are three colors set up in a row. The look "Fashion" is the third row. So basically, I would take a large shader brush and apply Bouquet Toss from my lashes to brow. Then I would take a regular shader brush, go to the next color (which is Honeymoon), and apply it all over the inner half of my lid. Afterwards, I would go to Ever After, apply it on the outer lid using an angled brush, and blend it all together with a blending brush. Instead of using a dramatic eyeliner, I would take my angled brush again and use Ever After on the lower lash line. Finish the look off with a few coats of your favorite black mascara.
Of course, you don't have to follow the cards. I decided to follow it to see how it'll look, and I really like the combination. I tried every single card, and the only one I don't care for is the "Day" look. Mix up the colors. Go against the cards. No matter what you come up with, it's going to match and look beautiful. I did that, and I actually recreated a day look that looks gorgeous.

- all over shadow brush
- shader brush
- dome smudge
- eyeliner brush
- lash comb
- Sephora Volume Black mascara
I've used both of these products frequently ever since I bought it. Overall, I would say the price is worth it. If you're thinking of getting either one, it passed my test. :)
Wednesday, April 13, 2011
Hair changes :)
 On Sunday, I did something that was completely spontaneous. Instead of going in the salon for my usual 8-week trim (which I did get), I decided to cut my bangs! I had side-swept bangs for about 5 years now, and I decided it was time for a drastic change. I didn't want to cut my hair because I've been growing it out for a few months, and I like my hair color. So I decided to get blunt bangs :)
 I would just like to say that my hairdresser is sent from the gods. Back in eighth grade, I decided to chemically straighten my hair along with getting blunt bangs. Huge mistake. First off, the Japanese straightening thing I had done (I'm sorry; I don't remember what it's called!) was so powerful that I couldn't put in any hair ties, ribbons, clips, etc. in my hair or else it would've left a dent. So if I decided I didn't like the bangs, I would've had to stick with my hair like that for a week until it was safe to put in any hair accessories. Well, my previous hairdresser chopped it all off, and it was a complete disaster. My face was rounder back then, and the bangs weighed down my face. Along with that, I wore thick glasses. I hated going to school that week. It doesn't sound like much now, but it was absolutely horrible back then! I laugh at myself now that I look back, but I applaud myself for being bold and taking a risk. I swore I would never get blunt bangs for as long as I lived, but of course I had to try it out one more time.
There were several reasons why I decided to take the risk again.
- My face has matured compared to middle school. Although I still have a round face and high cheek bones, it's lost weight and matured. I believed things would've went somewhat better.
- My previous hairdresser went completely blunt, straight, and thick. This will weigh down your face if you have a round face. I read articles before on hairstyles for round faces, and they all said that the blunt bangs had to be thinned out and wispy to balance everything out. My hairdresser knew exactly what she was doing, and I couldn't have been any happier :)
- It was just time for a change, period. This hairstyle was for nobody but myself.
Winter is officially over, ladies! Summer is only a few weeks away! Take a bold step, and change your hair up. Add highlights, dye it, cut it, or try out a new hairstyle!
To get an idea on flattering haircuts for your face shape, click this link. :)
Au revoir!
Wow, I've missed blogging on here tons. I bought a few things from Sephora today, so be on the lookout for a new post along with a makeup look.
Tuesday, April 12, 2011
I apologize for not updating :(
I will definitely blog tomorrow! In the meantime, watch this video for a messy yet beautiful prom updo :)
Wednesday, March 16, 2011
First Unretouched Ad Campaign from MAKE UP FOR EVER |The Makeup Divas Beauty Blog
First Unretouched Ad Campaign from MAKE UP FOR EVER |The Makeup Divas Beauty Blog
I think a lot of magazines should do this. Look at how gorgeous she is! It isn't necessary to retouch photos every single time. Beauty without Photoshop :)
I think a lot of magazines should do this. Look at how gorgeous she is! It isn't necessary to retouch photos every single time. Beauty without Photoshop :)
Monday, March 14, 2011
Clarisonic Brush
Hey guys! I feel like I haven't been on my blog for months. I wish I had an excuse as to why I haven't been posting weekly, but my only excuse is laziness.. No worries though; spring break is here, and I will be posting everyday (until school starts again next week..).
A few posts back (can't remember which one exactly), I mentioned the Clarisonic Brush and how I would be posting something soon about it. It's just going to be my review on it and why I think it's worth it. If you haven't purchased one yet, I suggest you invest towards one because it is simply amazing.
If you go on Clarisonic's website, they list a few benefits that come from using the brush
The only con I can think about is the pimples that you will be getting the first few weeks you use it. If you're prone to pimples and breakouts, expect your face to look like a pepperoni pizza for the few weeks. This doesn't mean that the product isn't working or it's too harsh; it's the brush getting down to work to remove all of the buried impurities in your skin. The only way for it to get out is to come out! So I'd say you'll have acne for about 2-4 weeks, but then it gets so much better afterwards. Your skin will be a lot smoother, brighter, cleaner, and vibrant. :) I would rather suffer for a few weeks than use my hands and nothing changes. Even if you don't have skin problems, why wouldn't you want this? It removes the bacteria that your hands can't remove.
I was one of the bridesmaid of a wedding back in October, and the makeup artist applied crap loads of makeup on my face to last the whole day and look to great in photos. Using the Clarisonic brush completely removed all of the makeup (you could see all of the foundation and blush on the brush..yuck!) and left no residue on my face.
I highly highly HIGHLY recommend buying one! It is SO worth it, and it's gentle but effective enough to use everyday. If your problem is acne or pimples, I am 99.9% positive that this will diminish your problem greatly. Take steps to prevent dirt and bacteria from getting on your face.
A few posts back (can't remember which one exactly), I mentioned the Clarisonic Brush and how I would be posting something soon about it. It's just going to be my review on it and why I think it's worth it. If you haven't purchased one yet, I suggest you invest towards one because it is simply amazing.
If you go on Clarisonic's website, they list a few benefits that come from using the brush
- Removes 6X more makeup than manual cleansing
- Leaves skin feeling and looking smoother
- Cleansing helps products work more effectively
- Gentle enough to use twice a day
- Reduces oily areas, dry skin patches and blemishes
- Minimizes the appearance of visible pores
The only con I can think about is the pimples that you will be getting the first few weeks you use it. If you're prone to pimples and breakouts, expect your face to look like a pepperoni pizza for the few weeks. This doesn't mean that the product isn't working or it's too harsh; it's the brush getting down to work to remove all of the buried impurities in your skin. The only way for it to get out is to come out! So I'd say you'll have acne for about 2-4 weeks, but then it gets so much better afterwards. Your skin will be a lot smoother, brighter, cleaner, and vibrant. :) I would rather suffer for a few weeks than use my hands and nothing changes. Even if you don't have skin problems, why wouldn't you want this? It removes the bacteria that your hands can't remove.
I was one of the bridesmaid of a wedding back in October, and the makeup artist applied crap loads of makeup on my face to last the whole day and look to great in photos. Using the Clarisonic brush completely removed all of the makeup (you could see all of the foundation and blush on the brush..yuck!) and left no residue on my face.
I highly highly HIGHLY recommend buying one! It is SO worth it, and it's gentle but effective enough to use everyday. If your problem is acne or pimples, I am 99.9% positive that this will diminish your problem greatly. Take steps to prevent dirt and bacteria from getting on your face.
- Wash your pillowcases every 3-7 days. Oils from your hair and face (maybe even mouth if you drool) reside in the pillow. You're putting your face on that every night. Buy separate pillow cases to use when it's time to change, and alternate the days!
- KEEP YOUR HANDS OFF OF YOUR FACE.
- Use an effective facial cleanser. I recommend using organic products simply because they don't have harmful chemicals that can irritate your face, and it's doing better for your skin and environment.
- Drink A LOT of water and eat healthy. I know you hear that everywhere, but it makes a great change in your diet, mood, and appearance. Eating and drinking right flushes out all of the impurities that reside in your skin and body.
Sunday, February 27, 2011
Leona Lewis "I Got You" Look... kind of.
Hey guys, so yesterday I was watching Leona Lewis' video I Got You and fell in love with her makeup!

Her makeup is flawless. I tried to create the same look, but I made a few mistakes. I know what mistakes I made, and I'm going to show you what I did wrong and what I did right. I will be posting this again sometime in the future, and it will look exactly like Leona's look. This was my first time trying it, and this was my attempt:


- Benefit's Erase Paste in 02 Medium
- Too Faced Shadow Insurance
- Sephora Floral Funk Eyeshadow Palette
- MAC Silverstroke Fluidline
- MAC 217 Blending Brush
- MAC 249 Large Shader Brush
- Stila Adventurous in Aspen Palette (no longer available)
- L'Oreal Lineur Intense Felt Tip Eyeliner in Carbon Black
- shu uemura eyelash curler
- Dior DiorShow Blackout Mascara in Waterproof
- Laura Mercier Loose-setting Powder
Cover any blemishes and dark circles with a concealer. I'm using Benefit's Erase Paste in medium.

Prime your eyelids with a primer.

Apply a white eyeshadow all over eyelids using a shader brush. This is the very first mistake I made. I used the white in Sephora's Floral Funk palette. The white has a lot of shimmer to it (something that you can't see on the actual palette until you apply it on your eyelids), and you're supposed to use a matte white. Instead of seeing a transition of white, silver, and black like Leona's look, the shimmery white made it look like I only used silver. When I redo this look, I will definitely go for a flat white.
Step 4:

Take your shader brush and press on shimmery silver eyeshadow to your eyelids starting from the middle and blending it outwards. I'm using MAC's Silverstroke Fluidline. If you're using this, I suggest taking your brush and gradually applying it on your eyelids. It doesn't show if you try to grab the color all at once and plop it on the eye.

Using a matte navy (I used the navy in Stila's Adventurous in Aspen palette), start to apply it on your eyelid starting from the middle and blending out and upwards. When you get to the outer crease, go towards the upper outer crease (sorry if my terminology isn't right, haha!) and blend. Repeat and blend. (You should be going in a V motion)
Step 6:

Step 7:
Apply liquid eyeliner starting from the middle of the eyelid closest to the lash line and finish it off. When you're finished, apply liquid eyeliner closest to the lower lash line. Make sure when the eyeliner meets together in the inner corner, drag the eyeliner down a bit to create a sharp cat eye look. This is another mistake I made. I didn't drag the eyeliner down and make a sharp line. As you can see from the pictures above, it's soft. Another thing, I went over the eyeliner numerous of times. Make sure you don't apply the liquid liner too thick!
Apply black eyeliner to the waterline and top waterline so no skin will show. (I hope everything I just posted makes sense!)
Step 8:
Take your black eyeshadow and blend it over the eyeliner. You don't want that harsh line showing.
Step 9:
Curl your eyelashes with an eyelash curler and apply black mascara to the top lashes only.
Step 10:
Take off the tape and blend the outer corners so there are no sharp lines on the outer corners.
Optional: Apply foundation and powder.
Step 11:
Finish the look off with a nude pink!
If I did not make any sense at all:
Jessica Harlow does a thorough job at explaining plus you can actually see what she's talking about. Although I did not do it exactly how Jessica/Leona did it, it was a good attempt, and I think my version could work for going to the club at night (just need to lessen and clean the eyeliner up a bit).
Commentary is wanted.
Au revoir!
Saturday, February 26, 2011
Favorite makeup removers
I don't even know how many makeup removers I've gone through- cloths, cleansers, liquid, etc.
I find that using a separate makeup remover and washing my face with only a salicylic acid face wash (without any makeup remover added inside of the face wash) is much more effective for me. These are my top two makeup removers.
1.
What I love about Take It Away is that it has a gel-like feel to it, and you can apply it on to dry skin. I usually apply it all over my face (if I have on any powder/concealer) and under, on top of, and around my eyes (if I'm wearing more than mascara as an eye makeup). Then I pump out two pumps of my facial cleanser and use my Clairsonic brush to wash my face. sidenote: If you haven't bought the Clairsonic brush yet, I would definitely make an investment! I'll do a separate post on how amazing it is some other time. When using Take It Away, the makeup comes right off, and my face feels completely soft and clean. :) I actually got this as a sample through my uncle's girlfriend who used to work for Clinique. The first time I tried it, I fell in love. The formula glides on smoothly,washes away cleanly, and it smells clean and fresh. I have a good amount in the sample she gave me, so when I run out, I will most definitely buy this. It's completely worth it :)
2.
Honestly, this is the best makeup remover I have ever encountered. I'm currently using Clean & Clear's Soothing Eye Makeup Remover, and I'm disappointed. It takes off makeup pretty well, but it leaves an oily residue behind. Then again, it's from the drugstore/Wal Mart so I shouldn't have had super high expectations. I tried this Estee Lauder Gentle Eye Makeup Remover during the summer at my aunt's house and swooned. Take It Away's makeup remover is more of something you'd use before you go to bed to take out all of the gunk in your face and eyes. This makeup remover however, is great for mistakes. Dip a q-tip and erase any smudges cleanly and without an oily residue. If you want to use it to remove your eyeshadow and eyeliner, it completely disappears.
I tried it again later on in October when I had a wedding to attend. That afternoon, my mother and I had our makeup done by a makeup artist for Giorgio Armani, and the makeup artist loaded us with pounds of makeup. By the time midnight rolled around, I was completely exhausted from being a bridesmaid to a hectic wedding and endless dancing. My makeup lasted despite the sweat and long hours (I definitely recommend Armani for long-lasting makeup!), but I didn't think the makeup remover could work its magic like it did before. I was wrong. Once the cotton ball touched my eyelids, WOOOSH. It was all gone :D So I'm definitely going to buy it the next time I go to Macy's or JC Penney. Goodness, I think it's worth $15.50 for 3.4 oz. But first, I have to finish my Clean and Clear (halfway through; thank you God!), because I hate wasting products.
What about you? What are your favorites and least favorite makeup removers?
Leave a comment or message me at thebeautyblogger@live.com!
Au revoir
I find that using a separate makeup remover and washing my face with only a salicylic acid face wash (without any makeup remover added inside of the face wash) is much more effective for me. These are my top two makeup removers.
1.
 | |
| Estee Lauder Take It Away Total Makeup Remover |
2.
 | ||
| Estee Lauder Gentle Eye Makeup Remover |
Honestly, this is the best makeup remover I have ever encountered. I'm currently using Clean & Clear's Soothing Eye Makeup Remover, and I'm disappointed. It takes off makeup pretty well, but it leaves an oily residue behind. Then again, it's from the drugstore/Wal Mart so I shouldn't have had super high expectations. I tried this Estee Lauder Gentle Eye Makeup Remover during the summer at my aunt's house and swooned. Take It Away's makeup remover is more of something you'd use before you go to bed to take out all of the gunk in your face and eyes. This makeup remover however, is great for mistakes. Dip a q-tip and erase any smudges cleanly and without an oily residue. If you want to use it to remove your eyeshadow and eyeliner, it completely disappears.
I tried it again later on in October when I had a wedding to attend. That afternoon, my mother and I had our makeup done by a makeup artist for Giorgio Armani, and the makeup artist loaded us with pounds of makeup. By the time midnight rolled around, I was completely exhausted from being a bridesmaid to a hectic wedding and endless dancing. My makeup lasted despite the sweat and long hours (I definitely recommend Armani for long-lasting makeup!), but I didn't think the makeup remover could work its magic like it did before. I was wrong. Once the cotton ball touched my eyelids, WOOOSH. It was all gone :D So I'm definitely going to buy it the next time I go to Macy's or JC Penney. Goodness, I think it's worth $15.50 for 3.4 oz. But first, I have to finish my Clean and Clear (halfway through; thank you God!), because I hate wasting products.
What about you? What are your favorites and least favorite makeup removers?
Leave a comment or message me at thebeautyblogger@live.com!
Au revoir
Wednesday, February 23, 2011
How I applied green eyeliner!

In this picture, my eyes look uneven (they probably are; I just never noticed it!). If you like this look, I'll be showing you how to do it step-by-step.
For this tutorial, I won't be able to show you how to do it exactly with pictures, because I can't find the right lighting :(
So I'm going to roam around the house to find perfect lighting for you guys so you can get a better idea on how to do it.
Materials Used:
- Benefit Erase Paste 02-Medium
- Laura Mericer Eye Basics primer
- MAC 252 Large Shader Brush
- Sephora Brand Floral Funk Eyeshadow Palette- Cool
- Rimmel London Soft Kohl Kajal Eyeliner Pencil Pure White 071
- Sephora Brand Retractable Waterproof Eyeliner in no.5 Green Shimmering Jade
- Stila Fabulous in Fiji Travel-sized Palette
- MAC 208 Angled Brush
- Rimmel London Soft Kohl Kajal Eyeliner Pencil Sable Brown 011
- shu uemura eyelash curler
- Hard Candy 1,000 Lashes Fiberized Lash Weave Primer
- Dior DiorShow Blackout Waterproof Mascara
- Bamboo Wear Bamboo Compact, Mirror & Brush
- Bamboo Wear Bamboo Silk Face Powder Refill in Translucent
- Tarte Cheek Stain- Tipsy
 Step 1:
 Apply Benefit Erase Paste under eye to camouflage dark circles and brighten up the eye area. Apply a dot size on your face to any dark spots or pimples and blend.
Step 2:
Prime eyelids with a primer. This step is important because it helps your makeup apply smoothly and it prevents your eye makeup from fading.
 Step 3:
 The makeup brush that I used was a brand called Solasi. I've googled it up and found no results. My grandmother's friend shipped it to her from China, so I'm not sure what store you can get it from. I've had it for about a year and had no problems with it so far. I find that my makeup applies well, so it's a keeper. I gave you a link to MAC's 252 large shader brush, because the shape is very similar to the one I used.
Take a white eyeshadow (I used the one in Sephora's Floral Funk palette) and cover your entire eyelid with it. Go over it a few times if it's too light.
 Step 4:
 Take a white eyeliner and apply it on your waterline and on the top eyelids closest to the eyelashes.
Step 5:
Take your bright green eyeliner, and apply it on the waterline and under the bottom lash line. Go over it a few times.


Step 6:
If you feel that your green isn't bright enough, apply green eyeshadow with an angled brushed over the eyeliner a few short strokes. I used Solasi's angled brush, but it's very similar in shape as MAC's 208 angled brush.
Step 7:
Apply brown eyeliner on the upper lash line. If it's not dark enough for you, apply black eyeshadow on your angled brush and lightly go over the eyeliner. When finished, take your shader brush and lightly dust white eyeshadow on again.
Step 8:
Curl your eyelashes with an eyelash curler. I used Shu Uemura's eyelash curler, because I find it to be the best. A trick to help keep your lashes lifted and alive all day is to take a blow-drier and blow heat on the eyelash curler for a few seconds. (I would say 5 is good enough) Test it on your face to see if it's the right temperature. Be careful to not burn your eyes! Apply your favorite black mascara. My personal favorite is Maybelline's Falsies, but I'm using DiorShow Blackout for this look.
Optional: Apply an eyelash primer before your mascara!


Step 9:
Dust on a powder that'll keep you oil-free throughout the day but doesn't cake up. I really like Physician Formula's Powder Refill. It keeps me covered, eco-friendly, and I can easily recycle the empty tin when I'm done and refill it!
 Step 10:
 Take your ring finger, rub it on a cheek stain, smile, and dot it all over on the ample of your cheeks. If you don't own a cheek stain, take an angled contour blush (something like MAC's 168 Large Angled Contour Blush), swirl the brush on your blush, smile, and apply the blush starting from the ample of the cheeks and blending upwards. You can also use a kabuki brush. Swirl the brush on your cheeks upwards and blend.
Step 11:
Complete the look by applying your favorite chapstick along with a light peach lip gloss. You're set! :)
I hope I explained it well enough for everybody to understand! This look is perfect especially since spring time is SO close. It's a fun, fresh look, and I hope you enjoyed it! I promise, I'm going to find the right lighting to show you guys exactly how to apply it on.
If I didn't explain it well enough and you need a video, here's a tutorial:
Au revoir!
Monday, February 21, 2011
More makeup palettes I want...
I don't know what's up with my obsessions with palettes lately. I usually have a period in time when I'm obsessed with a type of makeup. I've gone through my phases of eyeliner, blush, mascara, and I think it's time eyeshadows stepped in. Haha with that said, I've been curious about Kat Von D's badass makeup palettes as well.
The one that drew me in the most was (go figure) True Romance Eyeshadow Palette- Truth.
 The colors are light and feminine, and I am in love with it. But I've always wanted to try something different and do a smokey eye look. I was watching a video of Kat putting on her eye makeup using her palettes. I think True Romance Eyeshadow Palette- Metal Orchestra is so sexy and sultry.

Most likely, I'll wind up getting Metal Orchestra, because it'll be something different in my makeup bag.
Honestly, I have so much makeup that I don't even use everyday, but I'm always wanting more to experiment with. The thing is, I don't have that much money.
I think what I'm going to do from now on is ask for gift cards to Sephora/Ulta for my birthday. That way, I can spend all I want and go crazy.
The one that drew me in the most was (go figure) True Romance Eyeshadow Palette- Truth.
Most likely, I'll wind up getting Metal Orchestra, because it'll be something different in my makeup bag.
Honestly, I have so much makeup that I don't even use everyday, but I'm always wanting more to experiment with. The thing is, I don't have that much money.
I think what I'm going to do from now on is ask for gift cards to Sephora/Ulta for my birthday. That way, I can spend all I want and go crazy.
Too Faced palette and primer reviews?
So the other palette that I was debating on from my last post was this Too Faced Romantic Eye Classic Beauty Collection.
 The reason why I didn't buy this one yesterday was because the other Sephora palette was cheaper. I decided that I would get this the next time I went to Sephora but only if I get great reviews. The colors in this palette are too beautiful. Very natural, laid-back, and (as the name suggests) romantic. What really sold me though were the cards to create different looks that was inside of a little slot. It showed you step by step which colors to use and where to put it at on your eye. I put it down though, but I want to hear your reviews on it.
Currently, I have the Laura Mericer Eye Basics primer in buff.
 However, I feel like it doesn't stay on my oily lids, plus it's getting old. I didn't realize I needed a new primer until I was at the cash register. I looked online that night and couldn't decide between Too Faced Shadow Insurance or Urban Decay Eyeshadow Primer Potion- Eden.


If you own or used these products before, what's your opinion on it? Did it stay and remain crease-free?
I will try both products eventually, but for right now, I would like to hear your commentary on it.
Last but not least, I need a new translucent powder. Currently, I am using Laura Mercier's Loose Setting Powder. It's a great canvas for my face and applies my blush on smoothly and beautifully, but it also has talc in it. If you're unaware of the dangers of talc, read this article.
When it comes to my eyes and lips, I don't really care if the product is organic or not. However, when it comes to the face, I use nothing but all natural makeup. My blush and powder are from Physicians Formula.
Recently though, my mother had gave me the Laura Mercier powder, and I used it without questioning its ingredients because of the quality and price. To me, it was the only exception to my "natural only face makeup" policy. Once I found out it had talc in it (which was two days ago actually), I stopped using it. So I want to ask you; If you're using an organic translucent powder, what is the
Au revoir. :)
Currently, I have the Laura Mericer Eye Basics primer in buff.
If you own or used these products before, what's your opinion on it? Did it stay and remain crease-free?
I will try both products eventually, but for right now, I would like to hear your commentary on it.
Last but not least, I need a new translucent powder. Currently, I am using Laura Mercier's Loose Setting Powder. It's a great canvas for my face and applies my blush on smoothly and beautifully, but it also has talc in it. If you're unaware of the dangers of talc, read this article.
When it comes to my eyes and lips, I don't really care if the product is organic or not. However, when it comes to the face, I use nothing but all natural makeup. My blush and powder are from Physicians Formula.
Recently though, my mother had gave me the Laura Mercier powder, and I used it without questioning its ingredients because of the quality and price. To me, it was the only exception to my "natural only face makeup" policy. Once I found out it had talc in it (which was two days ago actually), I stopped using it. So I want to ask you; If you're using an organic translucent powder, what is the
- price range
- brand
- store/website you purchased it from
- how effective it is/your reviews.
Au revoir. :)
Super Mini Shopping Haul! (Very Mini..)
Hey beauty readers :)
So yesterday, I went to the mall and bought a few items. I was going to do a post yesterday, but I was so caught up with homework and study guides that I decided to post today. I didn't get a lot at the mall at all. But, I haven't gone shopping in about three months, and I had to buy a few things to hold me over until spring break (shopping spree!!!).
The very first store I went to was Forever 21.
 As you can see here, I was super happy that I purchased a few items :). But really, I just wanted to show off my new earrings. I've tried finding a link for you guys, but I don't think it's available online. It's a sea green color with shimmers of gold. I absolutely love it and think it's too cute.
I couldn't find the right lighting to take a picture, but I also bought these sunglasses in taupe/brown. I needed new sunglasses, and these were only $5.80.
 I had gone to American Eagle and seen these super adorable wedges that fit perfectly. However, I balked at the price tag (50??) and decided not to get it. Once I laid eyes on these wedges, it was an absolute must that I had to get it. I wore them today to school and received many of compliments :). They're lightweight and casual, but I recommend bringing a box of band-aids when you're wearing them! The back of the shoes have caused two blisters on the back of both feet, but everywhere else was completely fine and comfortable. Of course with every shoe though, you have to suffer in pain as it begins to break in. For $26, I think it was absolutely worth it.

The last thing I bought from Forever 21 was this beautiful necklace. I took a quick stop at the mall on Valentine's Day to find some earrings when I saw this. I was DYING to get it, but the line extended all the way to the back of the store. I figured this necklace was still going to be there in a matter of weeks, so I dropped it. Imagine my delight when I came back yesterday and saw it sitting high on the shelf :)
After leaving Forever 21, I decided to make a quick stop at Sephora just to browse around. I wasn't planning on buying anything at all until I saw this palette,
 The colors are absolutely gorgeous, but what really sold me was the cover of the palette. Click on the link, and you'll see how adorable it is! I am in love with anything floral, and I just thought this case was darling. I was debating though between this palette and a palette from Too Faced, but that's for another post. (I'm going to need y'alls reviews and comments!)
I've been looking for a really bright, beautiful green eyeliner, and I purchased this retractable waterproof eyeliner in no.5 green shimmering jade from the Sephora brand. I'm trying it out tomorrow, so I'll let you guys know how both eye makeups work out for me!
That's all that I bought yesterday (besides a couple of things from Barnes and Noble), and I'm just really excited. Let me know what you guys think! Also, if you bought the eyeliner or eyeshadow palette, leave a comment or email me at thebeautyblogger@live.com for any reviews.
Au revoir!
So yesterday, I went to the mall and bought a few items. I was going to do a post yesterday, but I was so caught up with homework and study guides that I decided to post today. I didn't get a lot at the mall at all. But, I haven't gone shopping in about three months, and I had to buy a few things to hold me over until spring break (shopping spree!!!).
The very first store I went to was Forever 21.

I couldn't find the right lighting to take a picture, but I also bought these sunglasses in taupe/brown. I needed new sunglasses, and these were only $5.80.


The last thing I bought from Forever 21 was this beautiful necklace. I took a quick stop at the mall on Valentine's Day to find some earrings when I saw this. I was DYING to get it, but the line extended all the way to the back of the store. I figured this necklace was still going to be there in a matter of weeks, so I dropped it. Imagine my delight when I came back yesterday and saw it sitting high on the shelf :)
After leaving Forever 21, I decided to make a quick stop at Sephora just to browse around. I wasn't planning on buying anything at all until I saw this palette,

I've been looking for a really bright, beautiful green eyeliner, and I purchased this retractable waterproof eyeliner in no.5 green shimmering jade from the Sephora brand. I'm trying it out tomorrow, so I'll let you guys know how both eye makeups work out for me!
That's all that I bought yesterday (besides a couple of things from Barnes and Noble), and I'm just really excited. Let me know what you guys think! Also, if you bought the eyeliner or eyeshadow palette, leave a comment or email me at thebeautyblogger@live.com for any reviews.
Au revoir!
Saturday, February 12, 2011
Spring/Summer 2011 Updos
Browsing around different websites, blogs, and fashion shows, I've noticed that hair will be very natural and effortless this spring. Each look takes about 2 minutes at the most, and it really gives us a break from scorching our hair with heating tools.
1. Buns
Messy, neat, curly, straight, low, high, braids, no braids, it's your decision how you want your bun to look. Don't be afraid to get creative and find the perfect look for you.


2. Volume
and nothing but.

to get volumized hair, just check out YouTube videos. I've listed a few for you:
3. Braids
4. Wavy, messy hair

Embrace your natural waves! I hate seeing girls with gorgeous waves, but they always fry it with a straightener! Wavy hair is beautiful and not everybody has the same waves. Give your hair a break, and just let it flow.
5. Deep side parts


6. Big clips
 I like how this look also incorporates a sleek, low bun.
1. Buns
Messy, neat, curly, straight, low, high, braids, no braids, it's your decision how you want your bun to look. Don't be afraid to get creative and find the perfect look for you.


2. Volume
and nothing but.

to get volumized hair, just check out YouTube videos. I've listed a few for you:
If your hair is thin, hard to volumize, or if you don't want to tease it:
3. Braids
I thought this tutorial was so simple, creative, and cute! It's definitely something you can wear.
4. Wavy, messy hair

Embrace your natural waves! I hate seeing girls with gorgeous waves, but they always fry it with a straightener! Wavy hair is beautiful and not everybody has the same waves. Give your hair a break, and just let it flow.
5. Deep side parts


6. Big clips

Friday, February 4, 2011
Top 5 Spring Trends 2011
Lately, schools all across the United States have been taking breaks ranging from one day to a week from school due to this frosty, chilling weather. But on Groundhog Day, the groundhog didn't see his shadow, so we're having an early spring! Some people are a bit skeptical about the groundhog but, here are 5 Spring Trends that are an absolute must.
1. Patterns, patterns, patterns!
Of course, the usual patterns for spring time are floral and stripes. Add in a few polka dots to really pop out.
Urban Outfitter's Cooperative Printed Bow-Tieback Dress
 Buckle Daytrip Striped Linen Shorts

Spring is the weather to wear fun, bold colors and patterns! This past winter, we went rough with combat boots and black, so I can't wait to see more girls on the streets transitioning from something dark to something beautiful and colorful designs.
H&M Polka Dotted Dress

H&M Floral Bracelet
 Pac Sun's Kirra Open Back Bustier Tank

2. Boatwear
Ranging from boat shoes, to nautical totes, and wedges are sure to impress! Think simple, and add stripes.
AE Woven Wedges

Aeropostale Breton Stripe Cropped Sweater
 Madewell Denim Midi Shorts in Tide Pool Wash
 Sperry Top-Sider Women's Lakeshore

3. White jeansFresh and clean; plus you won't roast in them!
River Island White Lightwash Straight Leg Jeans

4. Neutral colored vests
Urban Outfitters Fletcher by Lyell Chambray Vest

5. Mixed patterns
Be careful though! One of the rules that most people are afraid of breaking are mixing patterns together. This can go two ways, chic and stylish or messy and disastrous!
Forever 21 Floral Knit Bodysuit
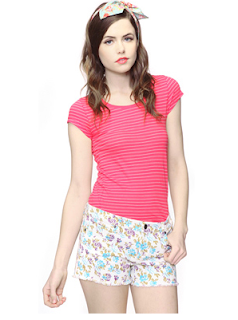
 Forever 21 Pink Striped Shirt and Floral Shorts
 When it comes to mixing patterns, don't be afraid to get creative with it!
I know many of us don't have the money to buy a lot of clothes, especially with this economy. Really anything that's bright and have a spring/summer feel to it are perfect. Or if you're not into loud and colorful clothing, wear neutrals and add a pop of color to your outfit. Scarves, handbags, shoes, or a busy necklace will be perfect. :)
Au revoir!
1. Patterns, patterns, patterns!
Of course, the usual patterns for spring time are floral and stripes. Add in a few polka dots to really pop out.
Urban Outfitter's Cooperative Printed Bow-Tieback Dress

Spring is the weather to wear fun, bold colors and patterns! This past winter, we went rough with combat boots and black, so I can't wait to see more girls on the streets transitioning from something dark to something beautiful and colorful designs.
H&M Polka Dotted Dress

H&M Floral Bracelet


2. Boatwear
Ranging from boat shoes, to nautical totes, and wedges are sure to impress! Think simple, and add stripes.
AE Woven Wedges
Aeropostale Breton Stripe Cropped Sweater


3. White jeansFresh and clean; plus you won't roast in them!
River Island White Lightwash Straight Leg Jeans

4. Neutral colored vests
Urban Outfitters Fletcher by Lyell Chambray Vest

5. Mixed patterns
Be careful though! One of the rules that most people are afraid of breaking are mixing patterns together. This can go two ways, chic and stylish or messy and disastrous!
Forever 21 Floral Knit Bodysuit


I know many of us don't have the money to buy a lot of clothes, especially with this economy. Really anything that's bright and have a spring/summer feel to it are perfect. Or if you're not into loud and colorful clothing, wear neutrals and add a pop of color to your outfit. Scarves, handbags, shoes, or a busy necklace will be perfect. :)
Au revoir!
Subscribe to:
Comments (Atom)